The package name is an important part of any android application. To make a unique android app you need a unique package name. Here in this article, I am going to give you complete guidance about package names. I am also going to show you that how you can change the package name of any android studio project.
When we should change the package name?
Every standard application should have its own unique package name. It is also known as the application id. Many people buy the same source code from the marketplace. In that case, the package name is actually the same for all buyers. Google play store takes that as a duplicate application. To avoid that situation you have to make proper changes and add some more functionality.
Many times developers forget to change the package name when they create the project. So this case before generating the final APK file we should change the package name. A unique package makes your app relatable and trusted. Here is an article about How to Change The Launcher Logo of An App in Android Studio
How to change the package name
I am going to show you the easiest method. The full process is divided into multiple steps. Follow those steps below to change the package name of your existing project. I also included screenshots of every step and included a video so that you can understand properly.
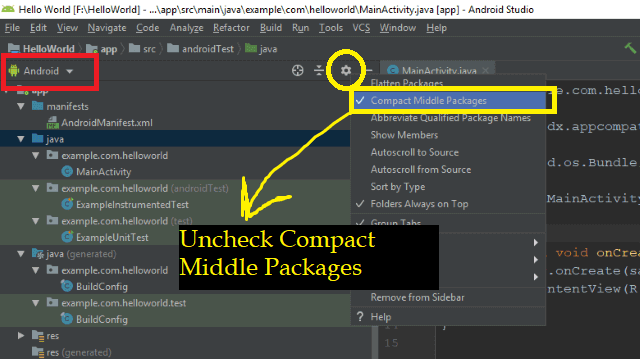
Step 1: Uncheck Compact Middle Packages
Click on the settings icon of the android folder section. There you can find many options. You will see 'Compact Middle Packages' is checked. Uncheck that to observe package structure.
After unchecking the option you will able to expand each of the middle packages. In this way, you can monitor the structure.
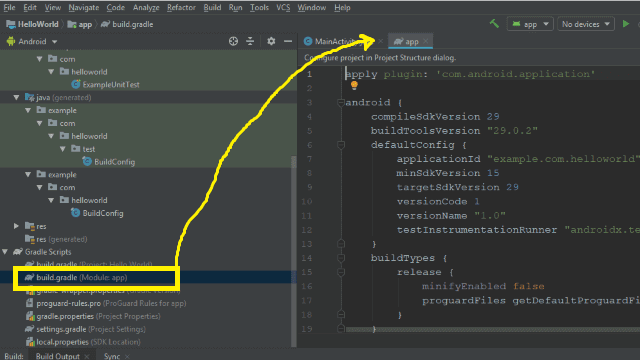
Step 2: Go to build.gradle file
Inside gradle scripts, you can find the build.gradle file. Click on that to go there. You can also use the search option to find that file.
Step 3: Change the applicationId and sync changes
Change the previous applicationId with your new unique package name. Replace the previous name with your new name. Here is my previous application id:
applicationId "example.com.helloworld"
I changed the example with com and com with pathgriho. This is our domain name so it is unique. To make sure the name more unique you can use numbers with them. Here is the modified applicationId.
applicationId "com.pathgriho.helloworld"
Step 4: Refactor and rename each folder
After changing the applicationId we have to change the previous folders. Like here I have replaced the 'example' with 'com' so I have to rename the 'example' folder. Here is the way you can follow to do that:
- Expand java folder
- Right-click on the target folder in this case I am changing the 'example' folder
- After right-clicking follow the order, Refactor > Rename
- Rename the folder according to the applicationId
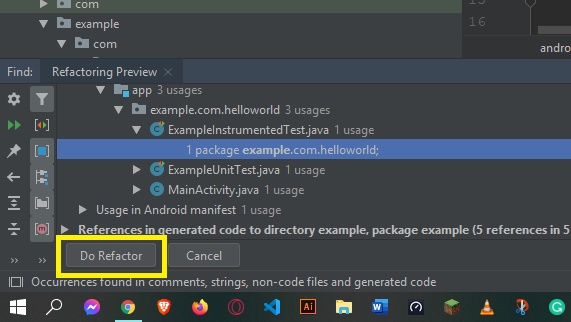
- Click on refactor
- Check the refactoring window and then click on 'Do Refactor'
- Follow the same way for each folder
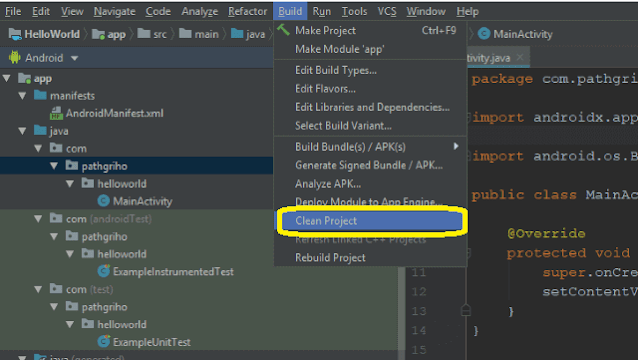
Step 5: Clen the project and then run
After finishing all those steps you should clean the project. It will remove all cache which will help you to run the app properly. Your package name changing is done if you don't get any error.
Here is a video for a better understanding of these steps:
How to see the package name of apps
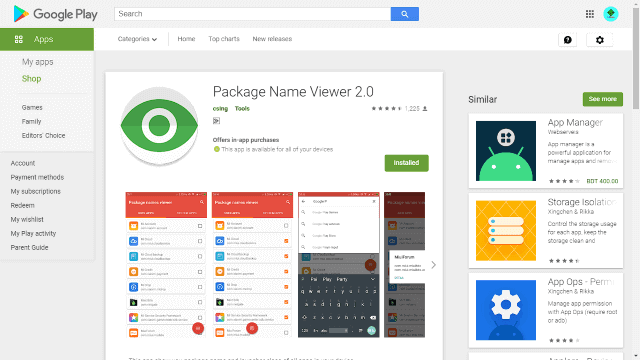
We can do that using an android app. Install this on your test device. Then open that app and search for the target app.
You can see in the screenshot that this app shows the package name of all installed app. This can be a great tool for android developers.
In this way, you can manage the package name and make your app better. We have many articles about the android studio. Explore our website to learn more about programming and development. Subscribe to our email list to get all new updates and free ebooks.


